loader

Connect a new TTN Gateway

The goal of this tutorial is to help you connect your gateway to The Things Network (TTN) in order to generate a LoRa network.
To get started, a few things are needed :
1 - If you don’t already have one, create a user account on TTN on the following link https://www.thethingsnetwork.org with rights to create Gateways and API Keys.
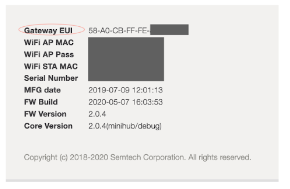
2 - Find your gateway EUI. The EUI of the gateway is not the WiFi MAC address printed on the back of the gateway,
but is derived from the first number that typically is of the form 58A0CBxxxxxx, printed on the top of the sticker below the QR code.
For example, if that number is 58A0CB800BE7, insert FFFE after the first 6 characters to make it a 16 character Gateway EUI (e.g. 58A0CBFFFE800BE7).
gateway_eui
3- The gateway EUI can later be found at the bottom in the WiFi setup screen.

Get the WiFi password of the The Things Indoor Gateway, typically printed on the back of the gateway.

The Things Indoor Gateway is added to The Things Stack via a process called Gateway Claiming.
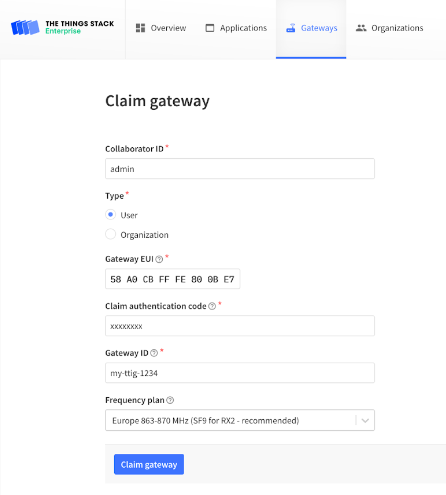
Go to Gateways in the top menu, and click the Claim Gateway button on the upper right to reach the gateway claiming page.
Fill the Gateway EUI, the Claim authentication code (the WiFi Password from Prerequisites), the Gateway ID and choose the appropriate Frequency Plan.
claim_gateway

Click Claim gateway to finish.

If your gateway has never been configured to any LNS, follow the steps below :

Step 1 : Keep the RESET button (small button at the back of the gateway next to the USB-C port) pressed for 5 seconds until the LED blinks rapidly from GREEN to RED and vice versa for a couple of times.
Step 2 : Hold the SETUP button (at the top of the gateway, next to the LED) for 10 seconds until the LED rapidly blinks RED.
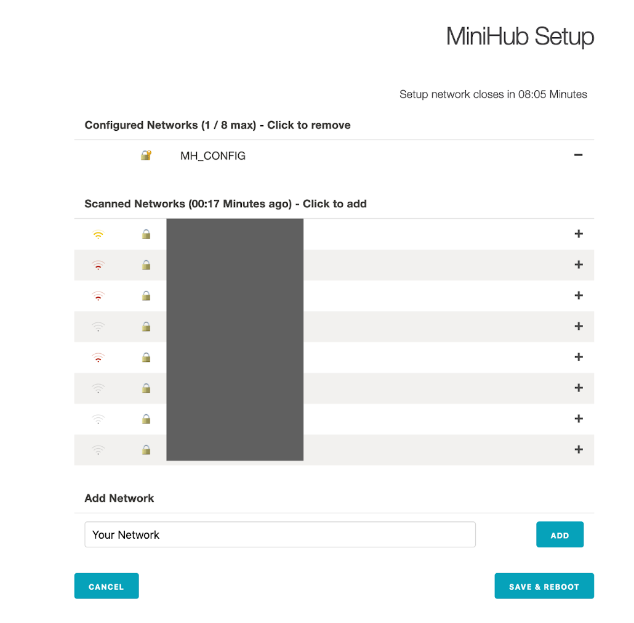
Step 3 : The gateway now exposes a WiFi access point whose SSID is MINIHUB-xxxxxx, where xxxxxx is the last 6 digits of the gateway EUI. The password for this network is same WiFi password from the Prerequisites.
Step 4 : After connecting to this network go to 192.168.4.1 using a web browser to access the WiFi config page.
save_reboot
Step 5 : Click Save and Reboot to finish.

If your configuration is correct,
  • The gateway will blink GREEN for a few seconds until it connects to the selected WiFi network.
  • Then, it will blink from GREEN to RED and vice versa for a few seconds while it connects to the server and fetches the necessary configuration.
  • Please allow 5-10 minutes for the gateway to pick up the new configuration.

If this is the first time your gateway is being powered on/connected to WiFi, it might pick up a new firmware depending on when it was last updated. This is indicated by alternating GREEN/RED blinks of the LED. Please leave the gateway powered on when this happens.
Thank you for following this tutorial, let us know if your TTN network is up and operational. Next, you might be interested in connecting a device to this network.

Licenza d'uso

Licence Creative Commons

Questa risorsa è resa disponibile secondo i termini della Creative Commons Attribution License - Condivisione alle stesse condizioni 2.0 France